Preparing Your Plymouth GTX for Restoration
Before diving into the classic car restoration of your Plymouth GTX, it’s crucial to take a methodical approach with Plymouth GTX preparation. This ensures the restoration process is smooth, efficient, and yields the best results. The initial steps set the foundation for a successful project and help avoid potential pitfalls down the road. Below is a detailed restoration checklist of essential steps to prepare your Plymouth GTX for restoration, emphasizing thorough assessment and documentation.
- Conduct a Thorough Initial Assessment
Begin by carefully inspecting every aspect of your Plymouth GTX. Look for rust, body damage, and any missing parts. Evaluate the condition of the engine, transmission, and suspension systems. This step helps you understand the scope of work needed and prioritize tasks accordingly. - Document the Current Condition
Create detailed records including photographs of the car’s exterior, interior, engine bay, and undercarriage. Take notes on visible damages, wear, and parts that require replacement or refurbishment. Accurate documentation will serve as a reference throughout the restoration and can prove invaluable if you plan to sell or insure the vehicle. - Gather and Organize Necessary Information
Collect original manuals, wiring diagrams, and parts catalogs specific to the Plymouth GTX. Having these materials on hand streamlines product ordering and technical troubleshooting. Also, record your vehicle identification number (VIN) and other important details for proper identification during restoration. - Create a Detailed Restoration Checklist
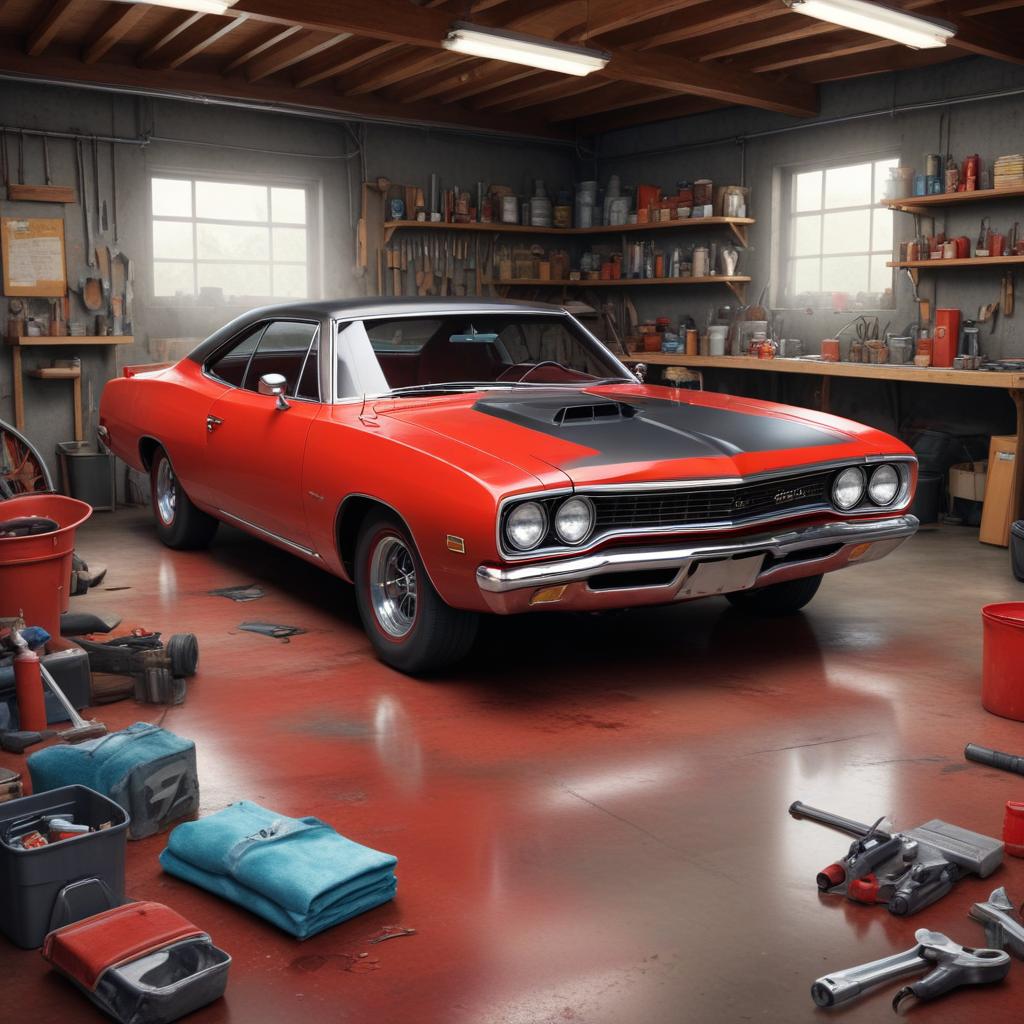
Based on your initial assessment, develop a comprehensive checklist that outlines each task and part required. Break down the restoration process into manageable phases such as disassembly, bodywork, mechanical rebuild, and final assembly. This organization helps track progress and ensures no critical step is overlooked. - Prepare a Clean and Safe Workspace
Set up a dedicated area with ample lighting, tools, and space to work comfortably on your Plymouth GTX. Ensuring a clean workspace reduces the risk of losing small parts and maintains safety during the restoration. Invest in proper storage for parts and tools to keep everything organized.
Following these Plymouth GTX preparation steps not only makes the classic car restoration more manageable but also improves the chances of delivering a pristine, show-quality vehicle. Meticulous assessment and documentation are the foundations that will support every stage of your restoration journey.
Assessing the Body and Frame Condition
When restoring your Plymouth GTX, a thorough body inspection is essential to ensure structural integrity and a flawless finish. Start by carefully examining the exterior panels for any signs of dents, dings, or previous repairs that might need attention. Pay close attention to common trouble spots where rust tends to accumulate, such as wheel wells, rocker panels, and the lower edges of doors. Using a good flashlight and tapping lightly with a small hammer can reveal weak spots or hidden rust bubbles beneath the paint.
Next, focus on the frame to check for any frame damage that could affect safety and handling. Look underneath the vehicle for any bends, cracks, or corrosion that could compromise the frame. Rust assessment should include both surface rust and deeper structural rust, especially around suspension mounts, cross members, and the floor pans. Surface rust can often be treated and sealed, but deep frame damage may require welding or replacement.
Documenting every flaw during the initial assessment will help you prioritize repairs and source replacement parts more efficiently. The Plymouth GTX body, known for its classic muscle car lines, deserves meticulous care during restoration to preserve its original charm while ensuring it remains safe and durable for years to come.
Documenting and Planning the Restoration Process
Effective restoration planning begins with a thorough documentation of the current condition of your Plymouth GTX. Before diving into any repairs, take detailed restoration notes including photographs, sketches, and written observations. This initial documentation serves as a baseline to track progress and highlights specific areas that will require attention during the project. Keeping organized restoration notes ensures nothing is overlooked and provides valuable reference material throughout the restoration journey.
Once the current state is documented, develop a clear project documentation plan outlining each stage of the restoration process. Break down the work into manageable phases such as disassembly, bodywork, mechanical repair, and finishing touches. For each phase, specify the tasks, estimated timeframes, required parts, and tools. This structured approach to classic car plans helps maintain focus and prevents feeling overwhelmed by the scope of the restoration.
Regularly update your restoration notes and project documentation as work progresses. Record challenges encountered and solutions implemented, as this detailed record will be invaluable for future reference or for sharing your experience with fellow enthusiasts. By documenting thoroughly and planning systematically, you create a well-organized roadmap that guides you efficiently through the restoration process, ensuring your Plymouth GTX returns to its former glory with precision and care.
Restoring the Mechanical Components
When it comes to restoring a Plymouth GTX, mechanical restoration is a critical step that demands precision and attention to detail. The mechanical components, including the engine, transmission, and drivetrain, form the backbone of your vehicle’s performance and reliability. Properly addressing these areas not only brings your classic car back to life but also ensures it runs smoothly and efficiently for years to come.
The engine overhaul is often the centerpiece of the mechanical restoration process. This involves a complete disassembly and inspection of the engine to identify worn or damaged parts. Components such as pistons, cylinders, valves, and camshafts are carefully examined and replaced or refurbished as needed. Upgrading to modern performance parts can also enhance the engine’s power output while maintaining the authentic feel of the Plymouth GTX drivetrain. Additionally, restoring the carburetor and ignition system plays a vital role in achieving optimal performance and fuel efficiency.
Next, the transmission rebuild comes into focus. Whether your GTX is equipped with an automatic or manual transmission, a thorough rebuild is essential for smooth gear shifts and longevity. This process includes replacing worn bearings, seals, gears, and clutch components, all of which contribute to a more responsive and reliable transmission. Adding an upgraded transmission cooler can be a smart modification for enhanced cooling and extended transmission life, especially if you plan to drive your GTX regularly.
The Plymouth GTX drivetrain restoration includes inspection and refurbishment of the driveshaft, differential, axle shafts, and universal joints. Ensuring these components are balanced and free of wear or damage is crucial for minimizing vibrations and delivering power efficiently to the wheels. Upgrading to performance rear-end gears or limited-slip differentials can significantly improve traction and handling, especially in high-performance driving scenarios.
Overall, a comprehensive mechanical restoration combined with carefully selected upgrades not only restores the classic feel of your Plymouth GTX but also enhances its driving experience and longevity. Taking the time to address every aspect of the engine overhaul, transmission rebuild, and drivetrain work will reward you with a mechanically sound and exhilarating muscle car that stands the test of time.
Engine Rebuilding Tips for Plymouth GTX
Rebuilding the Plymouth GTX engine requires careful attention to detail to ensure reliability and maximize performance. Start by thoroughly cleaning the engine block and all internal components to remove any debris or old gasket material. Inspect the cylinder walls for wear or damage, honing or boring them as needed to maintain proper compression.
Replace worn pistons, rings, and bearings with high-quality aftermarket parts designed for durability and performance upgrades. When assembling the engine, use proper torque specifications on all bolts to prevent leaks and ensure structural integrity. Pay close attention to the camshaft and valve train components; upgrading to a performance camshaft can significantly enhance your Plymouth GTX engine’s power output.
Engine maintenance is equally important after rebuilding; regularly check and replace fluids, belts, and filters to keep your engine running smoothly. Consider tuning the carburetor or upgrading to a modern fuel injection system for better throttle response and fuel efficiency. Additionally, installing a high-performance ignition system can improve combustion and overall engine reliability.
With meticulous rebuilding and consistent maintenance, your Plymouth GTX engine will deliver impressive performance upgrades while maintaining the reliability essential for classic muscle car enthusiasts.
Transmission and Drivetrain Restoration
Restoring the transmission and drivetrain of a classic Plymouth GTX requires detailed attention to maintain both functionality and authenticity. The transmission rebuild is a critical component, as it ensures smooth gear transitions and longevity of the vehicle’s performance. Start by thoroughly inspecting all internal components of the classic car transmission, paying close attention to worn gears, bearings, and synchronizers. Using OEM or high-quality reproduction parts can significantly enhance the reliability of the rebuild.
Drivetrain repair goes hand-in-hand with transmission restoration. Evaluate the driveshaft, differential, and axles for any signs of wear or damage. Lubrication points should be meticulously cleaned and re-greased to prevent premature failures. Since the Plymouth GTX drivetrain carries a substantial amount of torque, upgrading seals and gaskets during the restoration process helps prevent leaks that are common in aged systems.
Best practices include documenting every step during disassembly and reassembly to avoid mistakes and ensure correct torque specifications on bolts. Balancing the driveshaft and testing the transmission under load before final installation are essential steps to avoid vibrations and ensure durability. With careful work and the right parts, the rebuilt transmission and drivetrain will restore the Plymouth GTX’s driving experience to its classic, robust performance.
Interior and Exterior Finishing Tips
Restoring the interior details of your Plymouth GTX is a critical step to ensure authenticity and maintain the car’s classic appeal. Start by carefully assessing the condition of the upholstery. Use high-quality materials that closely match the original Plymouth GTX upholstery to preserve the vintage look and feel. For leather or vinyl seats, consider professional cleaning or repair services that specialize in classic cars, as they will use techniques and products designed to protect and rejuvenate aging materials without compromising authenticity.
Pay close attention to small interior elements such as dashboard knobs, door handles, and gauges. If replacement parts are necessary, seek out authentic or OEM-reproduction components to maintain the car’s originality. Restoring or replacing the interior carpeting is also crucial; select materials that match the original in color, texture, and pile to complete the period-correct interior restoration.
When it comes to exterior finishing, achieving a flawless classic car paint job is key. Start with a thorough preparation by sanding and priming the surface properly to ensure the paint adheres well and lasts over time. Use paints that replicate the original factory colors of the Plymouth GTX for an authentic appearance. Applying several thin coats rather than one thick coat will help achieve that deep, glossy finish typical of classic muscle cars.
After painting, focus on the trim and chrome details. Polishing or rechroming original trim pieces can restore their shine and bring back the car’s showroom look. Replace any damaged or missing trim components with period-correct replacements to maintain the vehicle’s integrity. Attention to these finishing touches not only enhances the visual appeal but also contributes to the overall value of the restoration.
Combining meticulous interior restoration with expert exterior finishing ensures your Plymouth GTX will not only look authentic but also feel true to its classic heritage. This attention to detail is what truly distinguishes a high-quality restoration from an average job, making your restored Plymouth GTX a standout example of automotive history.
Restoring Interior Upholstery and Trim
Restoring upholstery in your classic Plymouth GTX is essential to maintain the authentic look and comfort that defined the era. Start by carefully assessing the condition of the seats, noting any tears, sagging, or foam deterioration. Professional upholstery restoration often involves replacing worn fabrics and padding while preserving the original style and color to keep the interior true to its classic roots.
When tackling dash restoration, pay attention to cracks, fading, and damaged knobs or gauges. Use specialized products designed for classic car interiors to clean and rejuvenate the dashboard surface. In some cases, dash restoration may require repainting or replacing trim pieces to enhance visual appeal while ensuring the vehicle’s originality remains intact.
Seat repair should include strengthening the frame, replacing springs if necessary, and adding new foam padding to restore comfort. Matching the seat upholstery materials and patterns to the original design is key in upholstery restoration to maintain the car’s classic appeal. Additionally, restoring door panels, headliners, and other trim elements helps create a cohesive and authentic interior ambiance.
Overall, preserving classic car interiors involves patience and attention to detail. By carefully restoring each element of the seats, dash, and trim, you can achieve a timeless look that reflects the luxury and style of the Plymouth GTX while providing enduring comfort for years to come.
Painting and Exterior Detailing
Restoring the exterior of your Plymouth GTX to its original glory requires careful attention to detail and authentic techniques. Classic car painting involves thorough preparation, precise application, and meticulous finishing to ensure a quality result that honors the vehicle’s heritage.
- Preparation: Begin by thoroughly cleaning the surface to remove dirt, grease, and old wax. Sand the body evenly to create a smooth base for the Plymouth GTX paint. Address any rust spots or imperfections using appropriate fillers and primers designed for classic cars.
- Priming: Apply a high-quality primer suitable for classic car restoration. This step ensures proper adhesion and enhances the durability of the paint restoration, preventing flaking and fading over time.
- Painting: Use authentic OEM or closely matched Plymouth GTX paint colors to maintain authenticity. Apply multiple thin coats rather than one heavy coat, allowing sufficient drying time in between layers. Employ professional spray equipment for an even, showroom-quality finish.
- Clear Coat & Drying: Seal the paint with a clear coat to protect against UV damage and environmental contaminants. Allow the vehicle to cure in a dust-free setting to achieve a hard, glossy surface characteristic of classic car painting.
- Exterior Detailing: Finally, enhance the finish by polishing and waxing the surface. Pay special attention to chrome trim, emblems, and glass, restoring each element to pristine condition. This detailing phase is essential to highlight the beauty and craftsmanship of the Plymouth GTX exterior.